Always stay up to date
Innovative mobility, exciting trends for the future and high RPMs: Subscribe now to get notified of new content.
Subscription successful.
Subscription failed. If you need help follow the link for support.
Have you ever dreamed of working in automotive design? Of drafting your dream car or even getting to design your own BMW car? It couldn’t be easier! Using the new BMW 2 Series Gran Coupé as an example, our video tutorial will show you step by step how to produce an amazing drawing of your dream BMW car. All you need is pens and paper – and with our tips from two BMW exterior designers, even beginners can create an almost perfect autosketch in no time!
Observe cars

Observe cars
Before you try your first autosketch, you should collect as many impressions as possible. Observe cars on the street. How are they proportioned? How do the lines change depending on how light hits the vehicle? What are the most striking elements? From what perspective does the vehicle look the most dynamic?
Take your time
My advice to beginners is don’t set out with the expectation that the very first car sketch will be a winner. Be brave: there are no mistakes, just new food for thought. Think about how the shape and silhouette of your dream BMW should look. A coupé? A sedan? What do you want the sketch to express? Dynamism? Grandeur? Size? Where will the character line be? How will the famous kidney grille turn out? How do the different lines relate to one another? Throw a few intuitive sketches down onto some paper. Try to develop a feeling for a coherent line. Automotive design takes time, a balanced silhouette will develop. I like to compare it to the work of a chef – when developing a recipe, a chef will test lots of ingredients, will have to chop a lot of vegetables and will discard some of the ingredients or combinations on the way to creating the perfect dish. It may even mean starting from scratch a number of times.
Before your first pen strokes, think about the shape and perspective of the car. But leave enough room for improvisation – the perfect idea will gradually emerge.
Exterior Designer, BMW
Shading
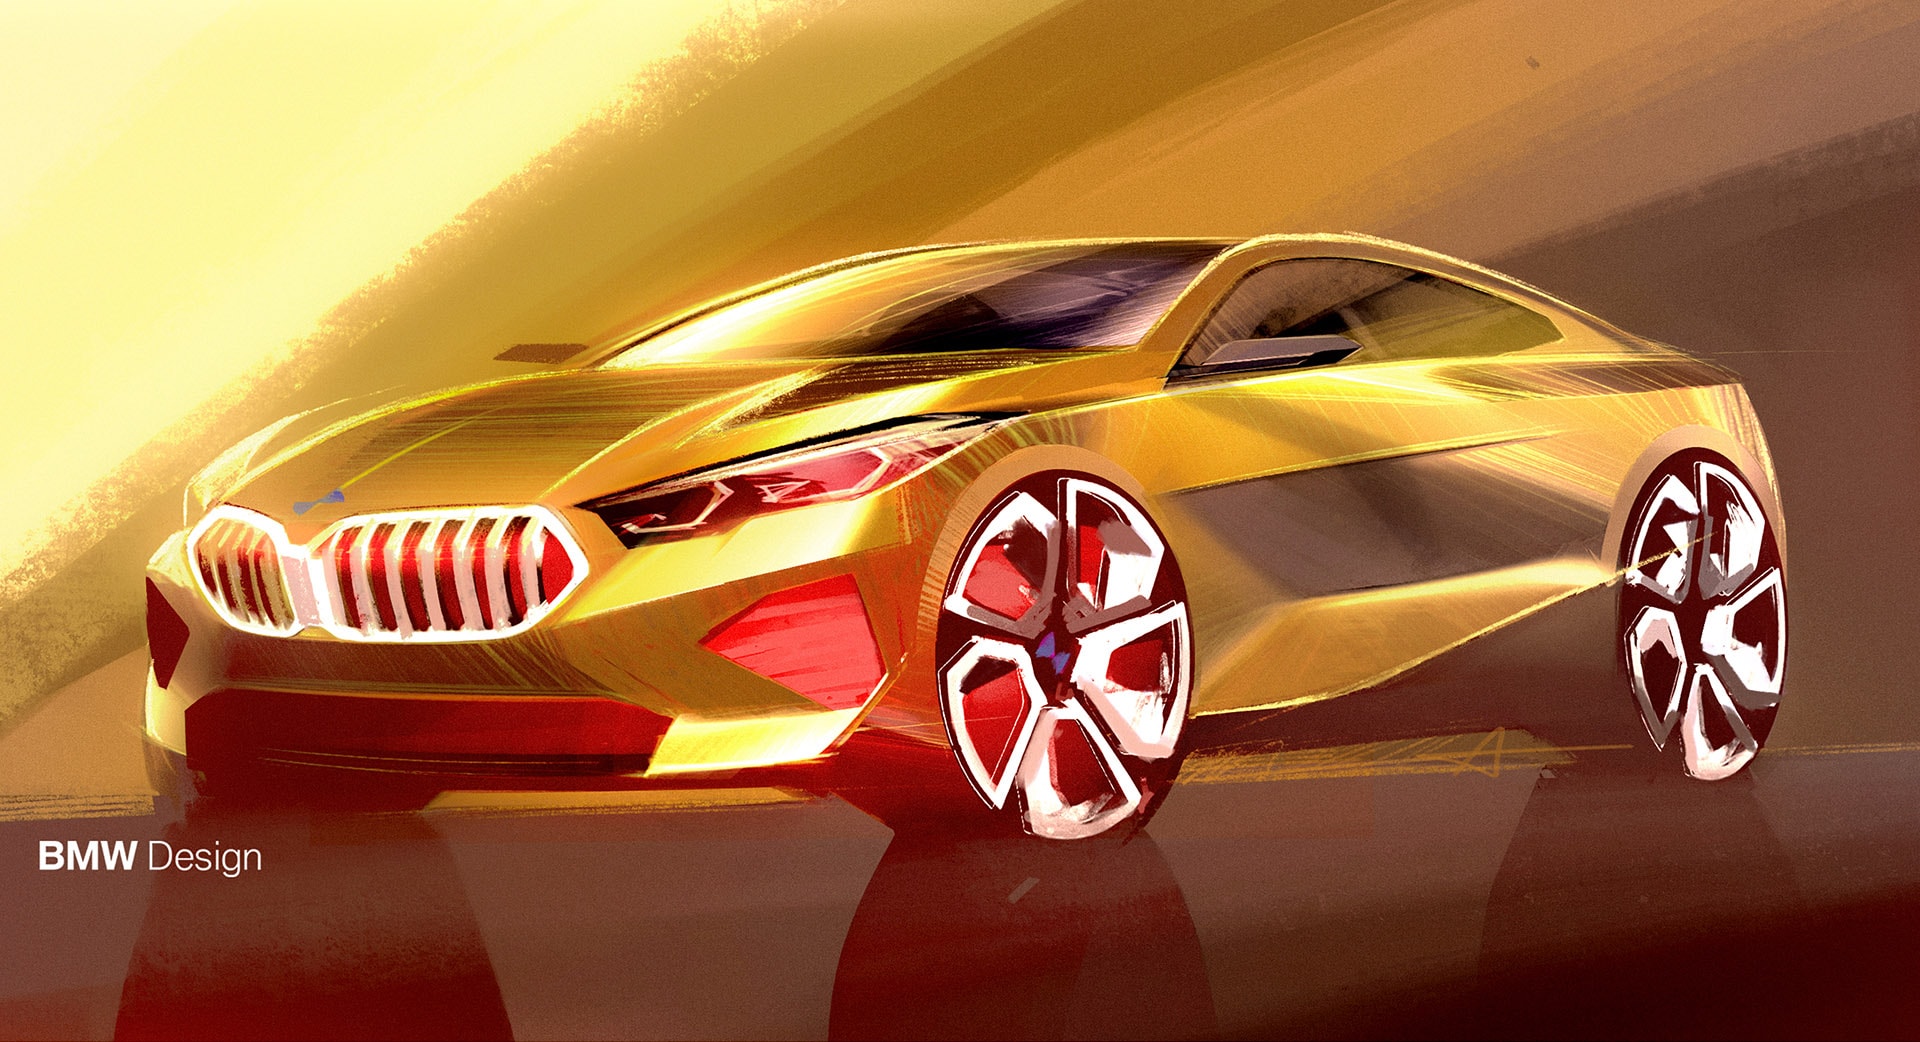
A fundamental trick of the trade I learned during my studies is this: there’s always a source of light, and mostly it’s the sun. It defines the shading on your design. There will need to be multiple bright areas where the rays of that light source hit directly, with the darkest areas correspondingly in the shade. My tip: assign values from one to ten depending on the degree of brightness and divide the different parts of the car body design according to their respective light levels. The graphic design of a car is about creating drama, creating an exciting movement out of the interplay of light and shadow. As for the technique of hatching: first, fill in the less dark areas with strokes from the tip of your pen, then fill in the darker areas using the flat side.
Find your own line
The first lines in any BMW car drawing will never be perfect. Don’t draw a single, continuous line from the front to the rear. Sketch from a relaxed wrist; feel your way. Rough-looking lines create character. Where lines are too perfect, the shape quickly becomes boring. A drawing should be personal. The lines arise from the emotion. Learning to draw for beginners also involves learning to approach perspectives slowly. Start with the two-dimensional side view. When you feel confident, begin your first three-dimensional designs with guidelines and imagine the vehicle as a box in the space. Your understanding of spatial representation will improve with each car line drawing.
The right use of color
The use of color lends the finishing touch to a sketch of a car. For that, however, you have to understand the proportions of a car. Color gives the vehicle emotion and makes metal and materials reflect. Be sure to take note the fact that a car will always interact with its surroundings. As an example, in sunlight a silver car appears almost blue, as it reflects the sky. On the other hand, in shaded areas such as towards the base of the vehicle, silver can take on a very warm tone. Use the color wheel as a guide here. For instance, the lighter the color red becomes, the more it changes to orange, then yellow – in areas of shade it heads toward purple. A green vehicle, for example, can appear orange to yellow in the sunshine, while areas in the shade may come across as a cold blue. Color gives your vehicle a three-dimensional appearance – try and keep these rules in the back of your mind when drawing.
2D sketching: getting started

2D sketching: getting started
For beginners to car sketch design, I recommend starting with a side view. For a two-dimensional side view, I always start with the footprint on the ground. Establish where the car is going to be, then start by positioning the two wheels on the defined ground in the form of a circle. Think about the basic shape – are you doing a sports car drawing, or an SUV? A flat front? A hatchback? You then build everything up step by step. Connect up the wheels and define the silhouette with successive, flowing lines.
Sketch out the silhouette of the side view flowing from left to right – always go from front to rear.
Exterior Designer, BMW
2D sketching: the details
Once you’ve sketched out the basic shape, you can go into detail in your car drawing. Define the greenhouse, i.e. the roof structure, the columns and the window panes. The design of the front and rear is based on the body shape. Finally, it is important to define and position details such as lights, grilles, swage lines, air intakes and rims.

3D sketching: the key points
Putting a 3D vehicle down onto paper is much more difficult. A key point is to start by giving thought to where and how you want to position the car in the space. Guidelines will help you to produce a BMW car drawing in the correct perspective and show the proportions correctly. Think of a car sketch like the design of a house: in both cases, vanishing points play a key role. There are three crucial elements here – the horizon line, vanishing lines and vanishing point. The horizon line is the observer’s eye level. You look up to everything above this line; everything below it you see from above. Vanishing lines are lines that run into the distance. They meet at a point on the horizon line known as the vanishing point. If you want observers’ gaze to fall on the edges or corners of an object, you can also use two or three vanishing points. In terms of the representation in space, this means that the shapes and lines of the car sketched seem to narrow more and more dynamically in the distance. Car designers must therefore be good at considering space. That’s something that can be learned, however – be brave and just get drawing!
Shading
For this technique, what’s important is to take your time and work slowly. When shading, make sure initially to leave all upward-facing surfaces free. These are the areas onto which the light falls. You can then gradually hatch all other areas in light gray – the more the area angles towards the ground, the darker and denser you fill it in with closely spaced parallel lines. In daylight, the upward-facing surfaces of vehicles reflect the sky and are correspondingly brighter than those areas that face the ground. Automotive design plays with exactly this lightness and heaviness, which is created by the contrast of lighter and darker areas.
Color
If you want to color your design, start with the lightest shading of that color if possible. Should the paint be matte or gloss? The light and shadow reflections depend on this finish. It’s best to start with shades of gray and then provide emphasis, perhaps with red, at the appropriate points. This automatically results in brightness and darkness. Here, too, however, you have to remember that there’s no such thing as a perfect first draft – practice makes perfect!
Author: Markus Löblein; Photos/Videos: BMW


